Self Service Tutorial
Learn to set up your pcad self-service portal
In this tutorial you will learn to build your activities, assign grade mappings, select your enrolled students, enter grades and record attendance. The button below will provide a downloadable PDF guide for your reference. The following videos will walk you through each step in the process in addition to the description above each step.
Step 1:Got to https://ss.pcad.edu in your browser and sign in.
Step 2: Select the Classes tab.

Step 3: Choose Setup tab in the row below.
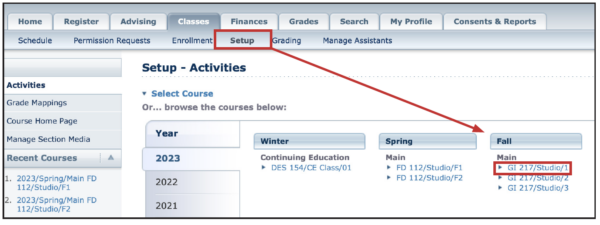
The classes tab will show you all of your registered classes and options for editing activities and grade mappings. Make sure to select your target class in the main window before beginning the process.
ACTIVITIES is where you create the projects and tests that you will grade
GRADE MAPPINGS is where your grading standards for letter grades will be created.
Step 4: ACTIVITIES reveals the ability to build a new activity set or to copy a set from a previous class.

Activities are a category of graded events in your class like a project, test, quiz, etc. Each activity should have a title, activity type (category) and possible points. Other options in this table can be added as desired but these three are important factors. You can choose to create brand new activities or copy activities from a previous class.
Weighted Activities have three selections by possible points (weighted by point value), equal weighting and individual weighting. This standard may be set by individual departments. Make sure to include possible points, weighting and due dates. Any of these choices can be changed at any time throughout the semester.
Step 5: GRADE MAPPINGS are the break points for letter grades. You can create your own or use the school’s standard model.
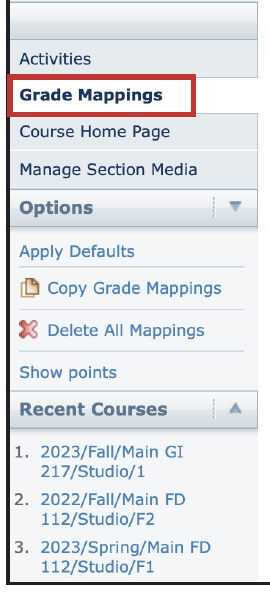
You can create your own grade mapping of copy an old map that you created before, however the defaults are common throughout student’s classes and would provide a consistent source of expectations.
Step 6: ENROLLMENT will be set up by the college and will propagate prior to your class going live. This is a repository of student information (download/print options), an image gallery and an email portal.

Step 7: GRADING AND ATTENDANCE should be kept up to date on a weekly basis. This is a reference point for students and support staff to see progress and where needs are presenting themselves.
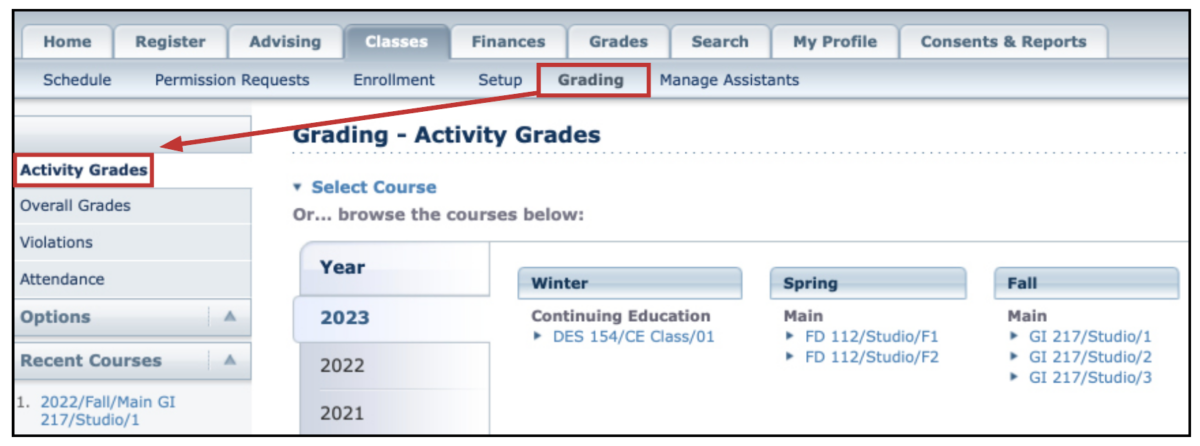
ACTIVITIES GRADES are where you record grades for individual projects.
View All Student’s Activity Grades will show a spreadsheet view where you can enter grades under columns defined by the activities that you entered into the system.
View Grades for the Specified Activity shows individual grades on a selected activity.
View Grades for the Specified Student allows you to view all grades for a selected student.
All of these options are where you can enter or alter grades. Make sure to SAVE after each change.
OVERALL GRADES are calculated by your weighting and what grades are presently entered in self service. Midterm and Final grades can be based on pure calculation of can be shifted by the instructor at their discretion. Midterm and Finals must be submitted on schedule but can be saved up until when they are submitted. Grading must be manually entered from Google Classroom results into Self Service.
ATTENDANCE needs to be recorded weekly and include attendance status and any notes. There is a batch status that can be added from the upper right of the attendance portal to be more efficient and then you can alter the few that are not present or late. Make sure to hit SAVE before you leave this window.