If you’re looking for a fun way to reuse materials around the house, this crawling spider puppet is a perfect fit!
Step 1
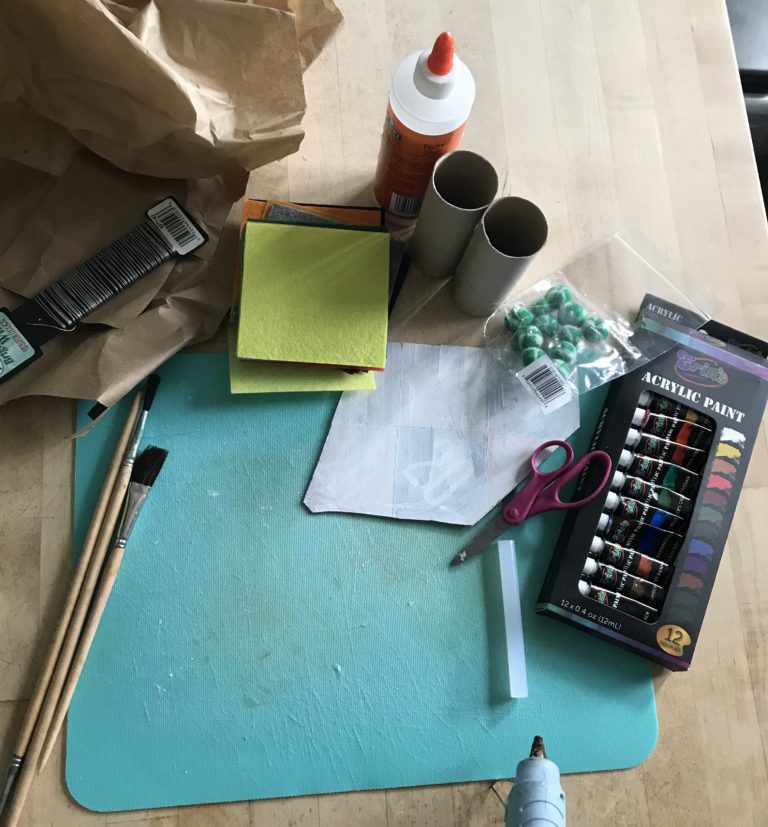
Gather supplies! You will need:
Scissors
Cardboard, thick paper, or card stock
Two cardboard toilet paper tubes or a plastic straw
Paint or markers
A pencil
Glue (tacky glue, white glue, or if a parent can help you can use a glue gun)
Supplies you may also want but do not need:
Pipe cleaners
Wire
Beads
Stickers
Parchment paper
Felt or multi-colored paper
Step 2
What parts do we need to make to create a spider?
A head, a body, eyes, and legs.
What else could a spider have?
Webs, fly food, cool hair or patterns, fangs, and more!
Let’s start with what we need.
Make a body! This will need to cover your two cardboard tubes or should be able to cover a plastic straw cut in half. We used a piece of cardboard for our body that was leftover from a past project! Your body can be any shape you want! You can also use paper or card stock if you don’t have cardboard.
Make a head! You can make this out of cardboard, paper, or cardstock. It can be any shape you want. We made our head out of a leftover cardboard tube.
Make or find legs! How many legs does a spider have? We decided to use paper that we folded into legs. You could use wire, pipe cleaners, or cut cardboard strips.
Make or find eyes! You can use beads, paper, and more. We took our hot glue gun and made little circles of glue on a piece of parchment paper. We let them cool, peeled them off of the parchment paper, and then made a dot in the middle of each one with a black Sharpie marker. Do you know how many eyes a spider has?
Making Legs
Making Eyes
Step 3
Assemble and paint! We chose to paint our spider all one color.
Always wait for your paint to dry first before you glue. You can use tacky glue or get help from a parent and use hot glue to start to put the piece of your spider body together.
Step 4
Decorate! We used tacky glue to attach our eyes and designs. We used left over felt to create designs for our spider.
Step 5
Let’s add our string! You will need two long pieces of string, a pencil or stick, and tape. Feed one piece of string through each tube under your spider. Tie each string to a stick or pencil. We used a long skinny paintbrush. Tape the pencil or stick to a board, table, or floor – anything that is safe for you to put tape upon. Ask your parents about where you should tape your stick.
Step 6
Let’s play! Take a string at the back of the spider in each hand. Pull the strings away from one another and watch your spider crawl.
We made two paper flies and a hot glue spider web to put near our stick so our spider could go out to lunch. We also made a web splat and attached it to the back of our spider with glue. There are so many possibilities for fun!
Finished
Did you make a spider or another type of string puppet? Did you make a video with your puppet? Did you write a story about your spider? Share your creations at ce@pcad.edu or tag us on Instagram @pcad_ce