Download and Install PaperCut
- Start by downloading the MacOS client from PaperCut.
PaperCut Client - When it finishes simply open the file, it will open like a flash drive.
- Drag the Papercut Client into the applications folder of that window.
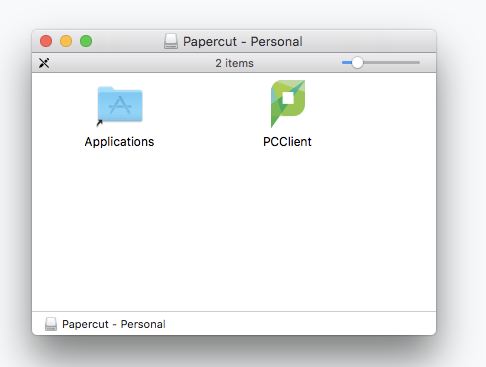
- Accept the popup dialogue if it asks you to replace or copy. You may also be prompted for your computer’s login.
-
Go to your Applications folder and open the PCClient. You may be told that it was downloaded from the internet… click Open.
If your computer doesn’t allow you to open it, you need to go under the Apple menu and select System Settings. Select Privacy & Security then Security and select Allow PCClient to be opened. Now go back to the Application folder and open the PCClient.
- Login to PaperCut with your PCA&D username and password and the PaperCut modal will appear in the upper corner.
- Next, you’ll need to install printers.
Installing the printers
- Under the Apple menu, open System Settings and select Printers & Scanners.
- Select the Add printer button at the bottom and search for a printer ( with an @printmac ending ) closest to your location in the building.
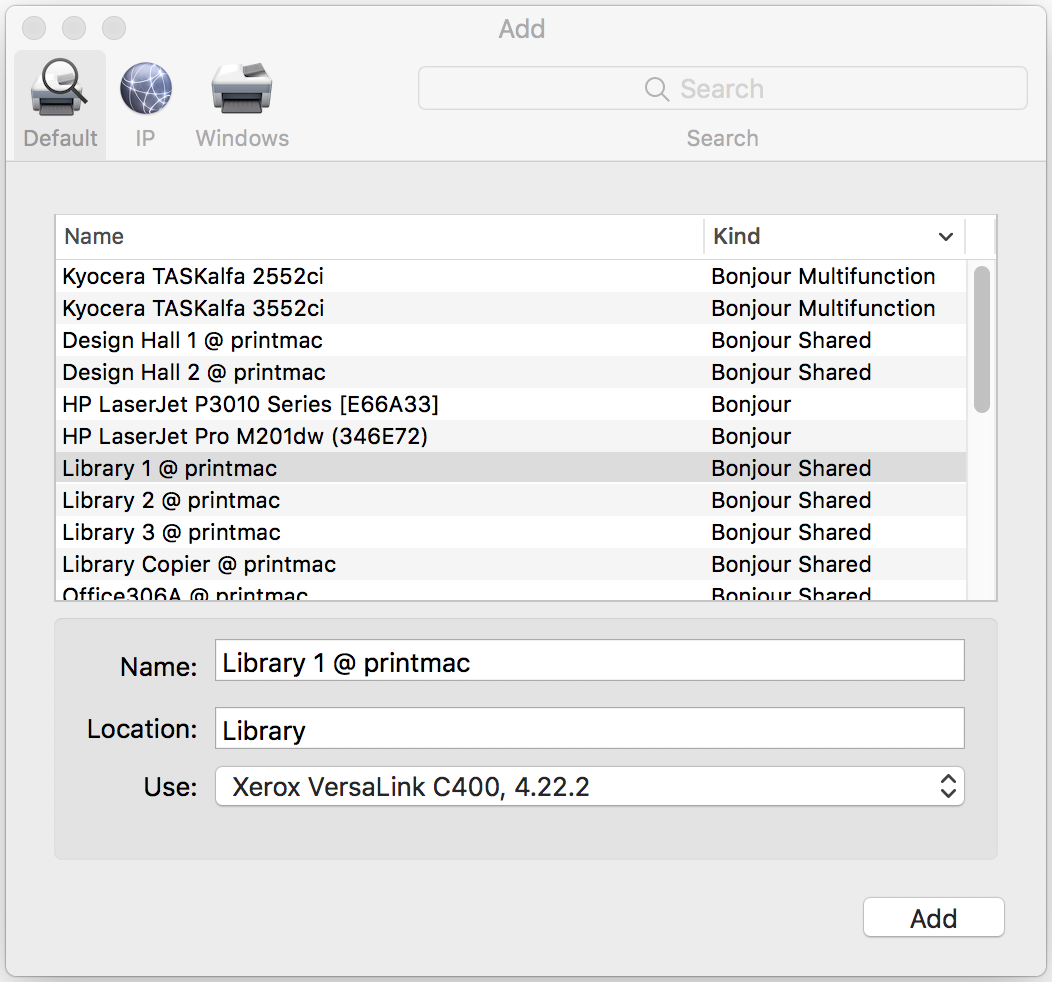
Once selected, you should see the Use: field change to anything except Generic Postscript. This is the driver, what encodes the print job for the printer to understand. If it still says Generic Postscript, close the add window and hit the + sign to try again.
We occasionally have trouble with computers not properly getting the drivers, so email it@pcad.edu if you have attempted multiple times.
- Once you have the printer added you can print. If you haven’t logged into PaperCut, you will be prompted to do so. Your login is the same as your PCA&D email account.
Download and Install PaperCut
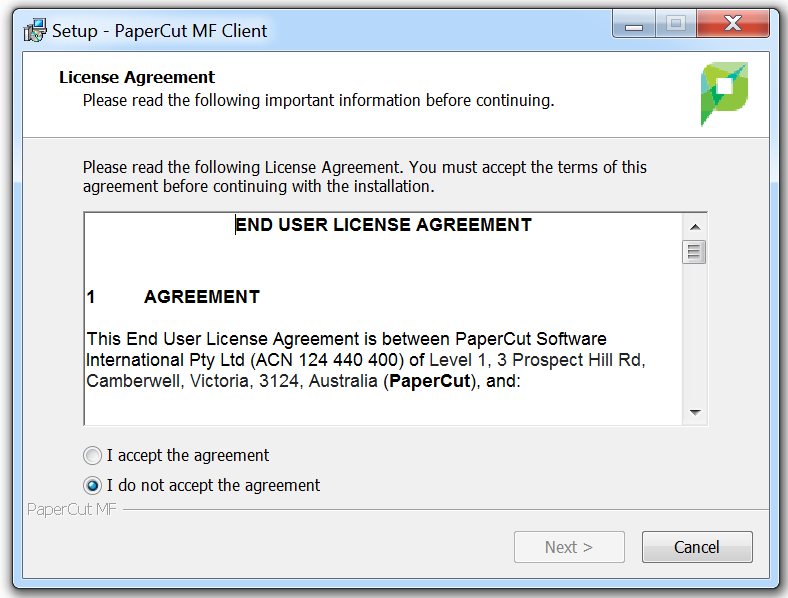
- Start by downloading the PC client from PaperCut.
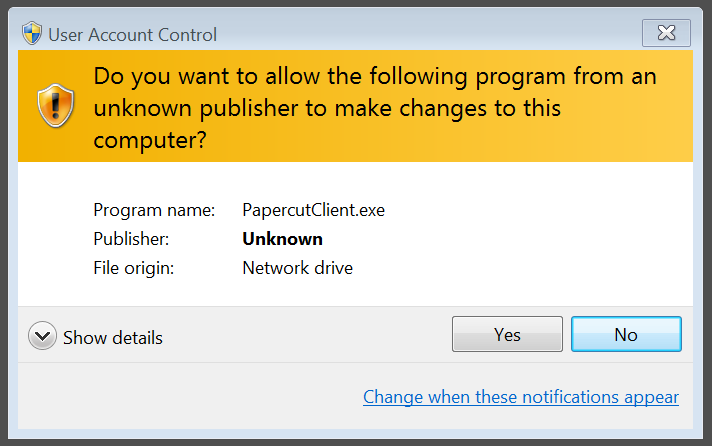
PaperCut Client - When it finishes simply open the file and it will request administrator permissions ( your Windows login ) to complete the installation. Accept it so that no issues bubble up.
- Once accepted, it will begin the PaperCut install. Accept their agreement, and then select the Local Install, the rest is up to you, progress through the installation.
Next, let’s install printers.
Installing the printers
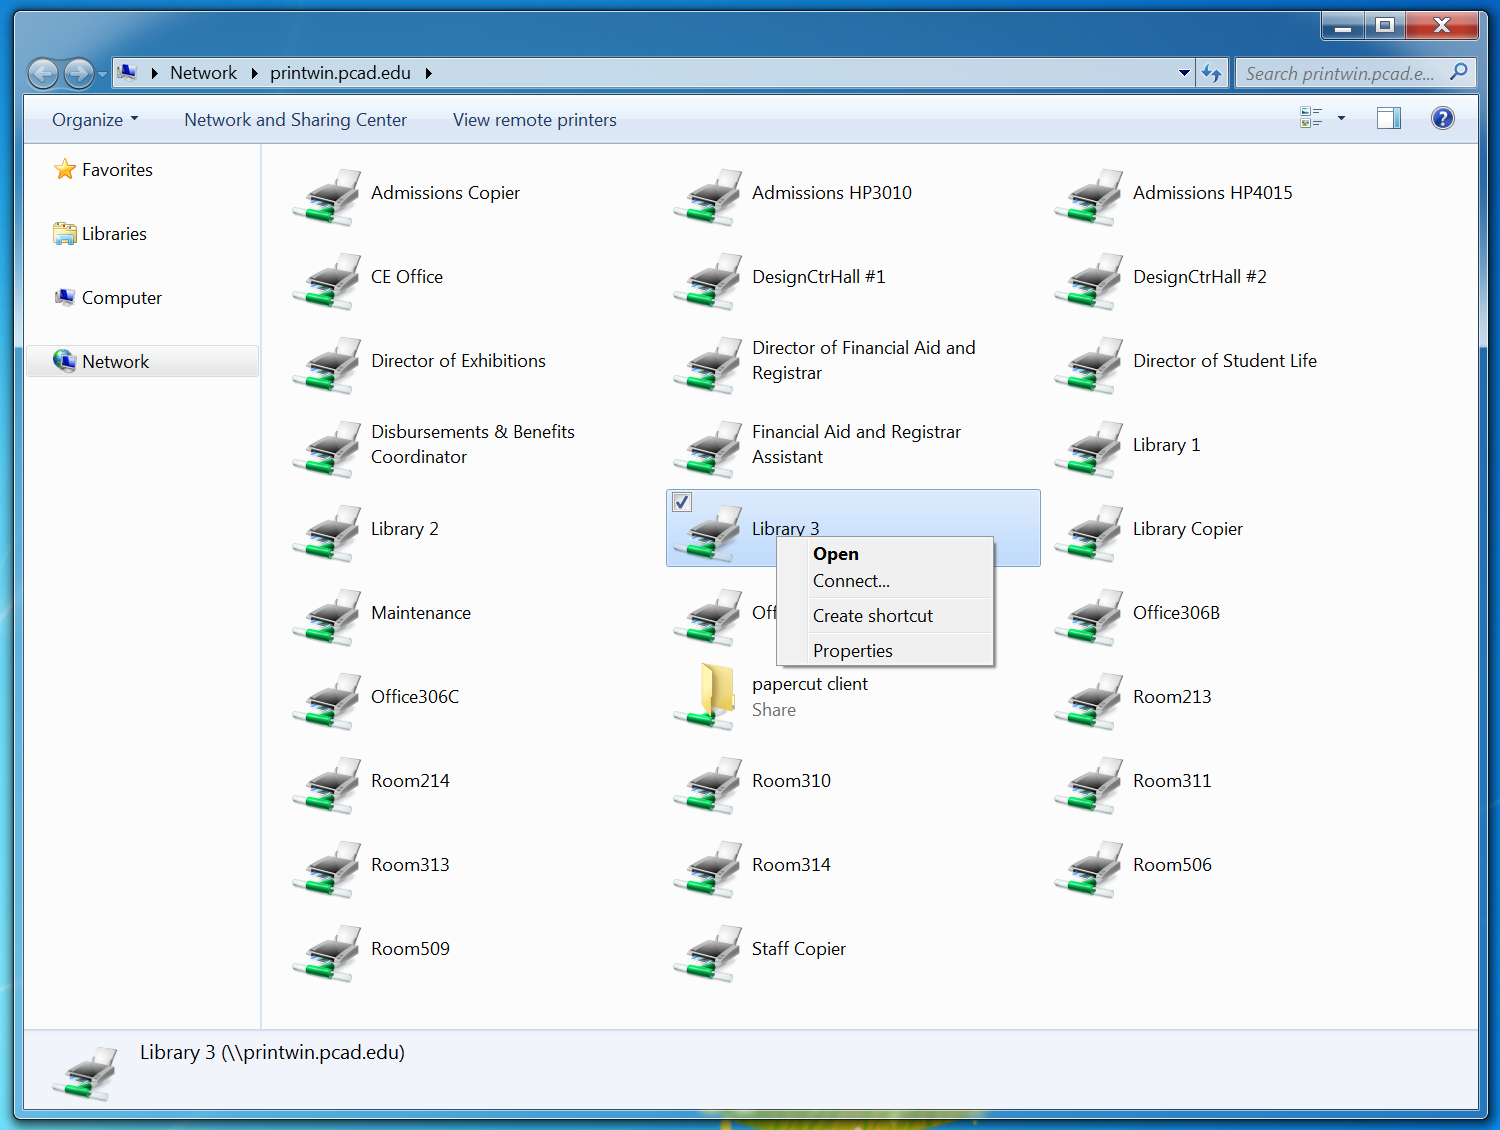
- If you are looking for printers you can access a complete list by hitting Windows Key + R; and typing \\printwin.pcad.edu\ and hit enter. You will see all printers available to the windows side. Please note that some of the printers are restricted to staff and faculty.
- If you find the printer you want to use, simply right click on it and hit Connect… This will take a few seconds to a few minutes to install the drivers.
- When you want to print, simply make sure you have the PaperCut client open and log in with your google account. Then proceed with printing like you normally would. Select the newly added printer from the drop down and the PaperCut client will pop up a second time to verify that you want to pay to print.
That’s all there is to it!
You’ll only be able to login while on campus.
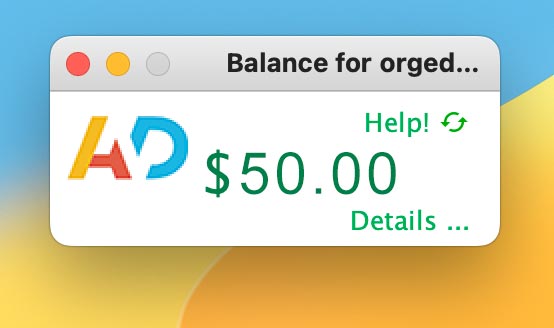
Login to view your account balance, print history, and print expenses. Use the same username and password that you use for your PCA&D email account. Whenever using a public computer, always log out and do not let it remember your identity or password.
PaperCut LoginEach semester you will be given printing credit from the college, usable on any of the school’s printers.
- Full-time students will receive $50 ($100 Yearly)
- Part-time students will receive $30 ($60 Yearly)
- Seniors will receive an additional $30 to ease the print demand of the Senior Show.
- $160 Total for full-time seniors
- $120 Total for part-time seniors
Printing Costs
- Printing color on plain paper in any classroom will cost 25¢ per page.
- Printing in black and white will only cost 6¢ per page.
- Large Format printers charge by the foot, starting at 60¢
Last and most importantly! Funds do not carry over the years, only the semesters.
Adding more credit
- To add more credit to your Papercut account, click on the Details link of your PaperCut client window and enter your Gmail username and password.
- On the left-hand side click on Add Credit and select the amount you would like to add. You may pay with a PayPal account, debit card, or credit card.

The Learning Commons offers color laser printers for student use as well as a large copier.
To use the copier you simply swipe your ID badge over the reader or login. If it’s your first time using the badge access, you will be prompted to link and login to your account. This will speed things up in the future so we highly recommend linking them.
The copier is very useful for making bulk prints or copies of any document, say a club is hosting an event or you need letter-size posters. You can also use it to scan documents and have them emailed to you, or added on a thumb drive.
If a printer eats your print, you can request a refund through papercut. Refunds will be given for hardware malfunctions and errors, paper jams, and no paper is stocked in or beside the printer. Please make your request within 1 hour of the problem.
Submit a refund
- Login to papercut.pcad.edu and open your Recent Print Jobs.
- Find the print that was destroyed and click Request Refund on the right.
- On the next page you will be given that jobs details and ask for the reason for refund. Fill it out with great detail. We will compare that with our logs and process your refund.
If you do not fill it out, we will not refund your print.